Sunday, March 18, 2012

St. Patrick's Day Funsies

Ok. St. Patrick's Day. Arrived, spent, gone. All of my intentions of blogging about our fun disappeared as well when my son woke up relatively early with leg pains. Poor sugar.

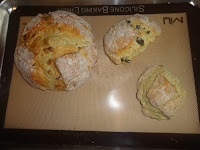
Breakfast was not supposed to be noteworthy. My mom was the one with the big plans--green deviled eggs, green this, green that...and later green veggies and green dip for the folks at my grandma's nursing home. But it didn't work out for her, and she was sad, I could tell, so I made a breakfast with her in mind. I didn't do green, because I really wanted my kids to eat it. So I went with rainbow. We had rainbow eggs (minus blue, I couldn't think of anything blue that was savory enough to go in eggs) with red and yellow bell pepper, purple onion and green cilantro. We had sausage links, which are my gold at the end of the rainbow, because it's a guarantee for getting some protein into my kids. We ate the Irish Gold Soda Bread that we made earlier in the week, and for something blue, frozen blueberries. Aren't frozen blueberries delightful?

Oh! I can't forget the Irish coffee. I mean, it wasn't technically an Irish coffee...but it did have Irish Whiskey and Irish Cream, so...it was close. When my brother and I went to England to visit relatives a little over a decade ago, a cousin told us how to make real Irish coffee. I still don't know if it's the real way to make it, I'm sure there are variations, but his was smokin' good, and this was his recipe.

Pack some brown sugar at the bottom of the coffee cup, about a tablespoon. Then pour in enough whiskey to get it wet. Then pour in a little more. Pour in your hot coffee, and then add cream. No stirring. The act of drinking it causes a bit of stirring to happen, and every sip ends up having a slightly different taste. It's amazing. I recommend it, and I don't think you need to wait until the next Irish-loving holiday. :D

Next Scotch (my partner and the father of my amazing children) and I cut the potato stamps you see for this craft. I did it last year, but just didn't have the right kind of paint (tried watercolor, tempera, markers.) So I researched and came to the conclusion I'd have to use acrylic paints this year. They worked FANTASTICALLY, and we'll be doing it again next year, I'm sure. Here we have Rainbow, in her pretty St. Patrick's Day shirt and a pillowcase smock, stamping shamrocks onto paper. I had that oval ceramic dish and put some dark green and some lighter green and some yellow into it, with the colors a little bit separated. Then I added water and swirled it about a bit. The swirls didn't show up, but there is some color variation. The kids really liked that, so I kept adding colors, using more yellow, ochre (dark yellow), burnt sienna, dark brown, white, and more green. I tried to keep all the colors on the green side. I'm so happy with this project! Each kid painted four sheets of paper.

Here's my potato stamp. I'm so proud.

By his second sheet of paper, Cloud was getting into smearing the paint around.

Then we had snack. This was also not an intentional St. Patrick's Day deal, but we had guacamole, and I'll be damned if it isn't green. Guacamole is one of my favorite things in the world. I used to be this purist snob until I got together with Scotch. He likes to experiment with flavors, and to date we have smashed up nothing short of mouth-watering creations every time. Sometimes we stick with the traditional pico de gallo sort of ingredients, but when he makes it, he often wanders into Tapatio territory, and we're not talking Guadalajara. He uses the sauce, adds cumin, garlic powder, onion powder, salt, pepper, Valentina, lemon or lime juice...whatever he feels like at the moment. This particular one had some Tapatio, cumin, salt, garlic, onion, lemon juice, chili powder, paprika and cilantro. Cloud ate most of it.

Then we made our St. Patrick's Day treat. I wanted to make something fun and easy. I found a recipe for whiskey balls, but I didn't have the ingredients. So I started looking at other recipes for whiskey balls, and found that most of them called for crushed Nilla wafers (one of the ingredients I didn't have.) Here, I thought, "Hmmm...Nilla wafers? Maybe not so Irish, but my kids will like it." So I found one with chocolate, Scotch went to the store for me (got some more whiskey for himself, as well) and we made some salty, chocolate-y whiskey balls. I modified the recipe, found at cooks.com (http://www.cooks.com/rec/view/0,1613,157164-250202,00.html), just a touch. Instead of adding the powdered sugar, corn syrup, and whiskey to the melted chocolate, I just threw them all in the double boiler and mixed them up as the chocolate melted. And I didn't make 55 balls... Also, I LOVE salt and dark chocolate together. After I made the first three rows, I decided to add some sea salt to the rolling mixture, and rolled the last two rows in that. I had to keep adding more salt to the cocoa and sugar because it stuck better to the balls. The recipe calls for leaving the balls in an airtight container overnight, and today I know why. Yesterday (we couldn't wait) we couldn't taste the whiskey. Today there's a very pleasant albeit very light aftertaste. We're DEFINITELY making these again next year, although I think an earlier-in-the-week project will be to make Nilla wafers from scratch. I'm an ingredient snob.

And then again, dinner...not intentionally noteworthy. I'm not an Atkins girl AT ALL. But when I heard that In 'N Out Burger had hamburgers with lettuce instead of buns, I decided to give it a try (I DO like lettuce) and I fell in love. I mean, I AM a burger girl, and I never really disliked the bun. But after eating one without the bun, and WITH extra, crunchy, fresh lettuce, I was won over. And now that's how I prefer my hamburgers...and cheeseburgers...and green chile cheese burgers with homemade mayo and homemade lacto-fermented ketchup. But I digress. If you like lettuce and if you've never tried it, go for it. It just might change your world. AND lettuce is green! AND we had POTATO chips. HA! So I just had to throw in dinner. This is getting ridiculous.
Here's a fun fact. REALLY fun. Potatoes come from Peru and the Andes, not from Ireland. I know more, but will not be sharing more here. I bet your good friend Google will share. :D

And here's the baby, and the baby decorated for St. Patrick's Day. I guess I'm about five and a half months along. I never got into tracking the weeks.

Hope your day was spectacular. Mine was.

Thursday, March 15, 2012

Good Idea Number 13,683

I don't like drying some things in the dish drainer, lying flat on a towel , or propped up against the wall...by the dish drainer and the towel.

I had a spare vase (really a vase, since all my vases could be considered spare) and some whole coffee beans I liked the smell of but not the taste of. They just weren't oily enough, but they had a soft, pleasant coffee smell.

One day while being frustrated about not having a good way to dry the kids' paintbrushes and while doing major cleaning, I decided to throw away the beans I just wasn't ever going to make coffee with, and BAM! I was struck with Good Idea Number 13,683...or so. I could put the beans in the vase and stick stuff in there to dry!

It works great, when I shove the wet paintbrushes and straws (like the hard kind that come with re-usable smoothie cups) in there, I get a quick whiff of coffee. The items dry very nicely. It's pretty enough for my...decor. It's simple. It doesn't take up much space. I love it. Happy to share it with you.

Tuesday, March 13, 2012

Fun, Kid-Friendly Bread Recipe for St. Patty's Day Bread


Confession: I don't really enjoy holidays very much. It's not just the consumerism aspect. It's the cutesy aspect. Everything's so damn cute and festive. I'm not a particularly grumpy person. I'd call myself cheerful, actually. But cute and festive I am not. And I'm ok with that.
I do, however, love the color green, and I love clovers, and, ahem...beer. And Irish car bombs. So I do have a little more fun celebrating St. Patrick's day than say...Valentine's Day. I'm glad they're almost back to back. I love replacing hearts with clovers for the hot second that disappears before Easter pastels take over.

And this year my kids, who I'm going to refer to as Rainbow (my almost four year old daughter) and Cloud (my two and a half year old son), are old enough to do a few more crafty things than they've been able to. So as we finished off our second pint of Guinness...

Just kidding. Cloud loves beer, but since I'm pregnant, we're not drinking that much these days...
This year I decided we'd try a recipe! It's called Irish Gold Soda Bread. I found the recipe at Apples4theTeacher, but modified it a bit. The Gold comes from the golden raisins that are in the recipe. Think Gold at the end of the rainbow. For funsies. Raisins are not typical for Irish Soda Bread.


I didn't want to have a ton of bread laying around, so I made half for myself and the family, and I gave a quarter each to the kids to play with. It was a bit tricky doing the measurements, but this is what worked for us:


Ingredients:

  • Large 1 3/4 c. flour for me, very scant 1 c. flour for each kid
  • 1/8 c. brown sugar for me, 1/16 c. for each of the kids (this was actually pretty easy because since brown sugar is supposed to be packed into the measuring cup, I just cut it in half with a knife, took out my half, cut the remaining half in half and gave each kid one portion)
  • 1/2 Tbsp. baking powder for me, 1/4 Tbsp. for each kid
  • Very scant 1/2 tsp. baking soda for me, very scant 1/4 tsp. for each kid
  • 1/2 c. golden raisins for me, 1/4 c. purple raisins for Cloud (he loves them, won't touch the golden ones) and none for Rainbow (ew!, she says, I'm not a raisin kind of girl!)
  • 2 C of buttermilk
  • 1 egg
For the buttermilk and the egg, I first measured out the buttermilk, added the egg, whisked it in completely, then measured out 1/2 c. of what was in the bowl for each kid and took the remainder for myself. I really didn't want to have to divide up an egg into...bits.

Then we followed the directions mostly as they were posted. My modifications are after the asterisks. **

Preparation:

  1. Allow the oven to heat up to 375 degrees. **We preheated and started preparations immediately. Cooking with kids always takes longer.
  2. Line a cookie sheet with parchment paper and set aside. **We used a silicone liner . It's awesome.
  3. Place the flour into a large mixing bowl. **I had the large bowl. Each kid had a smaller one. I just don't have three large mixing bowls.
  4. Dump in the brown sugar, baking powder and baking soda and toss to combine well.
  5. Fold in the raisins until incorporated into the dry mixture well.
  6. Pour the buttermilk into a separate small bowl.
  7. Break the egg into the buttermilk and whisk until completely combined.
  8. Pour the mixture into the dry ingredients and stir until all the ingredients are incorporated together and soft dough has formed.
  9. Flour a flat surface lightly and transfer the dough to the surface.
  10. Knead the dough 10 times or until the dough is pliable and smooth. **10 times was about right for us, but Cloud's got a little extra love.
  11. Form the dough into a large mounded round. **The mounds were small. For reference, later in the blog I have my hand, which isn't that big, over my larger loaf to show how big it is. I'd call it a nice size, nice enough to not overdose on Irish Gold Soda Bread.
  12. Place the dough on the prepared cookie sheet and use a sharp knife to cut a shallow X in the middle of the mound.
  13. Bake the bread for 45 minutes or until browned on top and a toothpick inserted in the middle comes out clean. **I started the baking all together on one cookie sheet. I pulled the kids' loaves out at about 25 minutes and I pulled mine out at 35 minutes. I'd call them perfect.

And that's it. Pretty fun. Very tasty with butter. Exponentially more so. Stay tuned for more St. Patrick's Day activities...just don't get your hopes up for good Easter ones. :)

Honey on the...Burn?


Yup. On the burn. A few years ago a friend of ours told us about putting honey on really bad burns, even sunburns. My mom tried it when she burnt her hand on my stove. She calls honey the bane of her existence, and it was hard to convince her to try. We wrapped her hand overnight and the next day she couldn't feel anything.

So... a couple days ago I was making naan in my cast iron pan in the broiler. I was using coconut oil, and I misjudged and kind of tossed the rolled dough into the pan. The coconut oil splashed all over the inside of my arm (got on my clothes, too, but the arm was the only exposed skin.) I ran my arm under cold water, realizing I wouldn't be using coconut oil as first aid in this situation. :) Then I went to my cupboard, pulled out the honey, applied to the inside of my forearm, and left it for the duration of the evening. Because it was a grease burn, it was, well...greasy. So the honey kept sliding off, and I'd slide it back on. I admit it, I took a few...tastes. Tasted just like honey. Mmm...

When it came time to go to bed, I put a bit more on, wrapped it so that honey wouldn't get all over my bed and kids (and so I wouldn't wake up to my daughter licking my arm) and when I got up in the morning I took off the bandage and VOILA! Couldn't even feel it. Now, two days later, I still can't even tell I have a burn. Except for looking at it, of course.


Monday, March 12, 2012

My One-Stop Cloth Diapering Opinion

I love cloth diapering. I thought in the beginning that it would be more of a hassle than disposable diapering, but that I'd do it for the health of my kids' bums and to lessen my impact on the environment. I ended up loving cloth diapering, not minding any of the bits involved. I thought my biggest problem would be storing poop...you know. When you're out and about and your baby poops and instead of putting the diaper and the poop in it in the trash like you would a disposable, taking it with you. It could be a bit cumbersome carrying that much...stuff around. But I'm strong, I found the system that works for me, and here's my sharing.

I like prefolds because I like cotton against babe's bum. I have used pockets, all-in-ones, all-in-twos, covers, you name it. I like the softness of prefolds, and they can be used with any type of cover. They don't work so well with all-in-ones, very bulky, but a prefold could be used to increase absorbency during night time.

Confession: I had a baby who woke every forty minutes to an hour for over two years. We did not cloth diaper at night. The thought of doing even more at night than I was already doing was so overwhelming. I was sleep deprived, nutty, batty...call it what you want. Nights were not my strong point, and I wasn't getting much help in the beginning. So we did a bit here and there, but for the most part we had disposable nights. Still, environment-wise, I think one diaper a day in the trash is way better than what it would have been.

So I have a favorite cover, of course. Sarah over at Softbums (softbums.com) designed, developed and patented the BEST cloth diaper cover ever. She actually made a system where you can snap in inserts of different sizes and materials depending on whether you have a heavy wetter and whatnot. But like I said, I like prefolds, so I only used the shells, not the system. Her diapers are...amazing. They really are one-size. She's got pictures of the shells on teeny-tiny babies and big ol' toddlers. Same diaper. So if at first glance they seem expensive, remember you're only buying ONE set of shells and not having to replace them after intervals. The shells can be used several times if the prefold/insert only has pee. Just take out the prefold, put it in the laundry bag (more on that later) and hang the shell to dry. After I introduced solids to my kids (that's when their poop AND pee changed to start stinking) I'd put a few drops of lavender oil and some water in a spray bottle and give them a little spray. I'd grab a dry cover off the line or grab a fresh one, put in a prefold and BAM! Done. Then, after a few hours, I could go back and use the ones I'd used earlier in the day or the day before...

As for the laundry bag. I'm not fancy, and I just used a bag by the toilet. I didn't use a pail because it would have taken up too much space in the bathroom, and it would have been another thing to clean. I checked out some large wetbags and saw they were one layer of PUL, so I bought some PUL and made a couple of wetbags. They were about as big as a standard pillow case. I know this because before I bought the PUL I made a wetbag out of an old pillow case. I lined it with nylon and added a drawstring. Way too fancy for what I needed. I mean, I still use it, but after checking out the other wetbags, I just made some simple ones. I'd fit about three days worth of diapers into the bag, toss in my shells from the line that needed to be washed (those could accidentally go unwashed for a while, so I had to be diligent about making sure I threw them in) and there was a nice-sized load of laundry. It's important to remember that too few diapers won't have as much friction in the washer and won't wash as well, and that a load too large will not have enough space for the scrubbing action. I'd just throw the wetbag in the washing machine right along with the diapers, inside out. FIRST I'd do a cold rinse-only cycle with vinegar. SECOND I'd do a hot, heavy soil wash with an extra rinse (temperature doesn't matter for rinse.) Then I'd often hang dry both the prefolds and the shells, but at least once a month the shells need to be dried, and the drying really does help with the softness for the prefolds. Drying the shells causes the plastic part of the PUL to swell and close around the thread at each spot where there's a hole. I mean, really, each spot where there is a needle hole is a spot where leaking can happen if you don't take care of the diaper properly, and at least occasional drying is one way to take care of them and prevent leaking from being able to happen.

There are a lot of good, baby-friendly, environmentally friendly detergents out there. The better the detergent, the longer the life the diapers and the better the absorbency. Detergents should not have enzymes, fabric softeners, optical brighteners or fragrances or dyes. Charlie's Soap makes a great detergent. It's just plain old laundry powder and quite inexpensive per load.

I used a diaper sprayer, also called a mini-bidet. It connects to the toilet line, they usually have some kind of thing that attaches the head to the toilet or a wall, and it's so convenient to be able to spray the poop off the diaper (any kind of diaper, not just prefolds) before throwing it into the diaper bag. Read reviews of sprayers. Some of them are awful, and I'd stay away from those. Mine has been in use for about four years, and we've had no problems. I just read reviews and chose one that other people found sturdy and well-made.

Next: diaper wipes. If you're using cloth diapers, why not use cloth wipes? You'd probably want about 40 of them. They're easy to make, a couple of layers of flannel or a layer of flannel and a layer of terry cloth. It's easy to use those baby washcloths. A little bit of friction is nice for getting poop off, but remember the butt of a brand new baby is sensitive, so be kind. It's easy albeit expensive to buy them. They get thrown in with the wash. Wipe solution is really easy to make. This is all for poop and pee...doesn't need to be fancy. For each cup of water, add one tablespoon of oil (olive oil, grapeseed oil, sunflower oil...jojoba, apricot kernel, whatever you want) and one tablespoon of baby-friendly soap, like Dr. Bronner's Baby Mild. After the kid's got a few months under his belt, adding some essential oil is ok, but look first to see if the oil is safe for babies and how much to use. I liked to drench and then ring out about 20 wipes at a time. I kept mine in a plastic airtight container. Keep any extra solution for the next batch. For going out, I'd put about six wipes into a ziplock bag and keep it in the diaper bag. For longer outings I'd probably throw in a couple more because they're great for more than bums.

And what about going out? You'll know soon if you have a heavy wetter or if your baby poops frequently. I only needed to have a few covers with me, and I'd take in the diaper about five prefolds and I always left about ten in the car. I got mine on craigslist, and I got a bunch, so I could stash them all over the house and in the car and didn't have to worry about running out. I'd take my wipes already wet. I'd also take two wetbags. One was the poop bag, and in it I'd put anything that touched poop, including clothes if there was a blowout, and all of the pee prefolds. In the other wetbag, the shell bag, I'd put the shells that were only peed in. This way I could still re-use shells (they didn't dry in there, but they weren't really wet, just slightly damp, and really the dry prefold was what was touching the skin) and I wouldn't have to carry as much stuff with me. I was paranoid about poop leaks into the rest of my diaper bag, so I usually kept the poop bag, which was smaller, inside of the shell bag. When I'd get home I'd turn the shell bag inside out to air out, and hang it up with the shells. The poop bag would get turned inside out and put in the wetbag by the toilet. I had about four wetbags altogether, and so if I was going out again before laundry day would grab another poop bag to take with me, grap the shell bag and some shells off the line, re-stock my ziplock bag of wipes, and head on out. You really do get your system.

For the teeny teeny tinies...freshly born babes... my favorite was to just use a prefold with diaper pins on either side. They don't move that much, so diaper pins aren't scary for the poke-factor. They have those clips still on their umbilical cords, the whole thing is big and awkward... I didn't even use covers unless we were going out, and we didn't go out before their cords fell off. Mine peed such a tiny amount that it wouldn't soak all the way through a prefold, but I could tell right away if they were wet and could change them so they weren't sitting in their stuff.

Well, I think that's it. If you have questions or comments, please do ask or share. I'd love to be able to give my opinion and help, because I learned so much from trial and error, I experimented with so many kinds of diapers, it took a while to find my groove, and before I did cloth diapering was a bit frustrating. But when I found it, I found it, and I rocked it. I hope you do, too.


Saturday, March 10, 2012

I put the 'fun' in functional -- Apron Tutorial


Ok. First tutorial. Ever. We'll see how this goes.

This is the apron. I tried to make a pillowcase dress for my daughter and it failed miserably. I think the pillowcases were too thick. She said, "No! I wanted a fancy pillowcase dress!" I think I'll be making the dress out of something else, because even if I had not failed, it still would not have been...fancy. So. I'm not a fancy kind of girl, and this isn't a fancy kind of apron. But it's fun, I don't mind getting it dirty, and it is VERY functional.
I tried on the pillow case dress to see if it would fit around my hips and bum, and it did, but barely and not terribly comfortably. So I started fresh with two more pillowcases (and two more my color-style, as well) and cut the material up the back so that it tied in the back rather than being a slip-on. First I laid them on my surface (I don't have a good table or area, so I just used my living room floor carpet) and lined them up so that the inner layer would be sticking out of the bottom a bit. I laid right down on top of the pillowcases with the lower most edge at my knees and marked with a pen where my waist was. This was my measuring tape-less way to figure out how long I wanted it. Then I cut off the tops so they were even (the tops being the edges that were sewn) and stuck the inner one inside of the outer one.

Then I cut out what would have been arm holes for the pillowcase dress. I realized while I was...struggling into the dress that those arm holes were an awesome access point to my jeans pockets. So I decided to keep them.

When I cut them out, I realized after I opened them up that I had PERFECT pocket shapes.
So I decided I'd like to have lined pockets, with the blue side facing out, and nothing fancy. I turned the pocket-to-be upside-down and pinned along the top to give the final product a nice, rounded feel.

I did that for both pockets. Then I hemmed all the way around the entire apron, one long hem-job.

Then I folded down the top of all three portions so that I'd have a place to put a belt or tie. I hadn't yet decided what I was going to do for that.


Then I pinned on two washcloths to act as small towels. I LOVE to wipe my hands on my thighs. I wanted some reinforced area where I could wipe, wipe, wipe, and even get a little friction-y scrubby action going if I needed. Towels seem to get more absorbent the wetter they are (up to an extent, of course), so I decided to just put some washcloths there.

The large size of the washcloths didn't leave much room for pockets, so I staggered them and added a little pen pocket out of the scraps of the blue material. I made a pocket out of the orange material that was pretty big and put it below the pockets you can see in this picture. It's as wide as the area between the washcloths and it goes to just below the line of the orange pillowcase. You can see in the last picture where it looks like the orange line dips down a bit. That's the bottom of the big pocket. It blends in a little, but I don't mind. I love it.

I pinned them all on, sewed them on, and then had to decide what to do about a belt. I ended up cutting the extra material from the tops of the pillowcases in the longest direction I could, in strips about an inch and a half wide. I folded the strips into thirds lengthwise, pinned them to the next strip all folded over and tucked in, saving the blue pieces for the ends, and sewed right down the middle with a zigzag stitch. I'm calling it the 'whatever belt'.

So there's the apron all laid out. I forgot to take a picture of it with the belt in it.

For funsies I tried the apron on with my arms in the...well, the arm holes that became pocket-access spots. I was thinking if I was frying food or something, I could pop the apron from around my waist up to the top for some coverage. Seems like it'll do the trick. I'm very pleased with this apron. The pillowcases were purchased at Goodwill. I had some new washcloths, but in hindsight I think I'd use some that had been washed and dried a few times. That seems to increase absorbency. So it's going to be a few washes before my washcloths are in prime condition. But how awesome to make a 'fun'ctional apron out of re-purposed items. This apron took me about two and a half hours, including laying it out to take pictures. I'm definitely a novice. And I don't care too much about fancy, like I said. So if you're a better seamstress or care more about looks, your time will vary...but probably not too much.

Have a good one! Please link back to this blog if you use this tutorial and/or the pictures, and comment if you do. :)


Wednesday, March 7, 2012

Baking soda and water

During my first pregnancy, my mother-in-law gave me a great home remedy for heartburn/indigestion. See, I have no torso. I mean, I have one, but it's so short, it's not good for much baby carrying. I do really well during pregnancies, but my baby, pretty early on, presses my food back up into my esophagus. After three pregnancies, I've learned I can somewhat alleviate the discomfort by not eating yeasty breads and whatnots. But that doesn't necessarily do the trick. Water makes it worse (a LOT worse), and I start getting dehydrated, then cranky... ugh.

So my mother-in-law told me she had major heartburn during her pregnancies and said her main remedy was to put a teaspoon or so of baking soda into a couple ounces of water, stir, and sip. Slowly. Very slowly. If you drink it too fast, you'll drink too much, and there's really a very fine balance between enough to neutralize the burn of what comes up (we're not fixing the problem, we're definitely treating the symptom with this one, so we're not stopping stuff from coming up, we're just helping the way it feels) and burping. Big burps. Not big loud belches, but big, baking soda and meal flavored burps that feel like they come from the intestines. So the way you do it is take a sip, wait a minute or so, take another sip, wait another minute or so, until you're feeling better (this is all after you start experiencing the burn.) Then you wait and you don't drink anymore until you feel more burn, which is usually a few hours for me. This little concoction can be left by the bed to be used for the first bit after bedtime. But do let me warn you--it tastes absolutely disgusting in the morning. It's definitely best to chuck it and make it fresh if you're needing it in the morning. It will taste something like the rotting fish at a poorly-cared-for marina.

And that being said, I hope you have a wonderful day and that this can be of some help to you or someone you know. Cheers!